AWS Account
The next step is to connect your AWS account to Sprinters.
For this you’ll need the credentials of an AWS user that has enough permissions for Sprinters to launch, list and terminate EC2 instances.
You can achieve this by
- Creating an IAM policy with the required permissions
- Creating an IAM user with that policy attached
- Creating credentials for that IAM user
- Connecting your AWS account to Sprinters using those credentials
Permissions
Sprinters strictly adheres to the principle of least-privilege and only requests this absolute minimum set of permissions to be able to operate:
| Action | Usage |
|---|---|
ec2:RunInstances |
Launch ephemeral EC2 instances for your runners |
ec2:CreateTags |
Tag those EC2 instances as runners |
ec2:DescribeInstances |
List runner EC2 instances and check whether they are running |
ec2:ModifyVolume |
Optimize boot speed of runner EC2 instances |
ec2:TerminateInstances |
Clean up runner EC2 instances in case they fail to gracefully shut down |
ec2:DescribeSpotPriceHistory |
Automatically select cheapest availability zone for spot instances and calculate savings |
Just as important as the permissions Sprinters has, are the permissions Sprinters doesn’t have:
- no login access to your EC2 instances
- no access to the contents of your EBS volumes
- no access to your EBS snapshots
Create the IAM policy
This IAM policy sets the permissions your IAM user will have.
Create the required policy in the AWS Console
To do so, paste this policy document:
{
    "Version": "2012-10-17",
    "Statement": [
        {
            "Sid": "sprinters",
            "Effect": "Allow",
            "Action": [
                "ec2:RunInstances",
                "ec2:CreateTags",
                "ec2:DescribeInstances",
                "ec2:ModifyVolume",
                "ec2:TerminateInstances",
                "ec2:DescribeSpotPriceHistory"
            ],
            "Resource": ["*"]
        }
    ]
}
in the JSON policy editor:
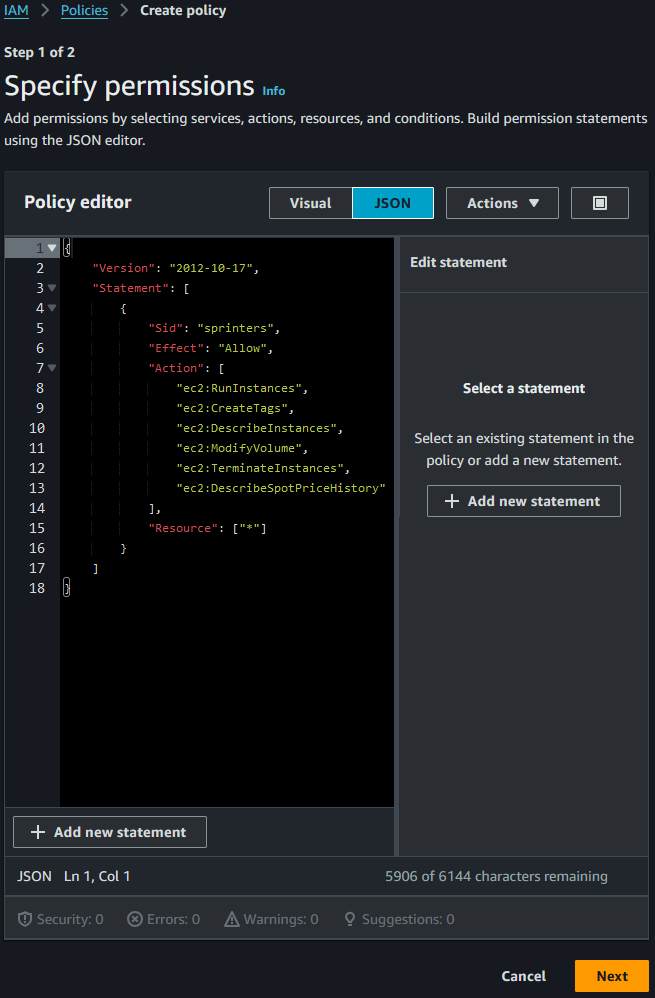
Assign it the sprinters-policy name and create it:
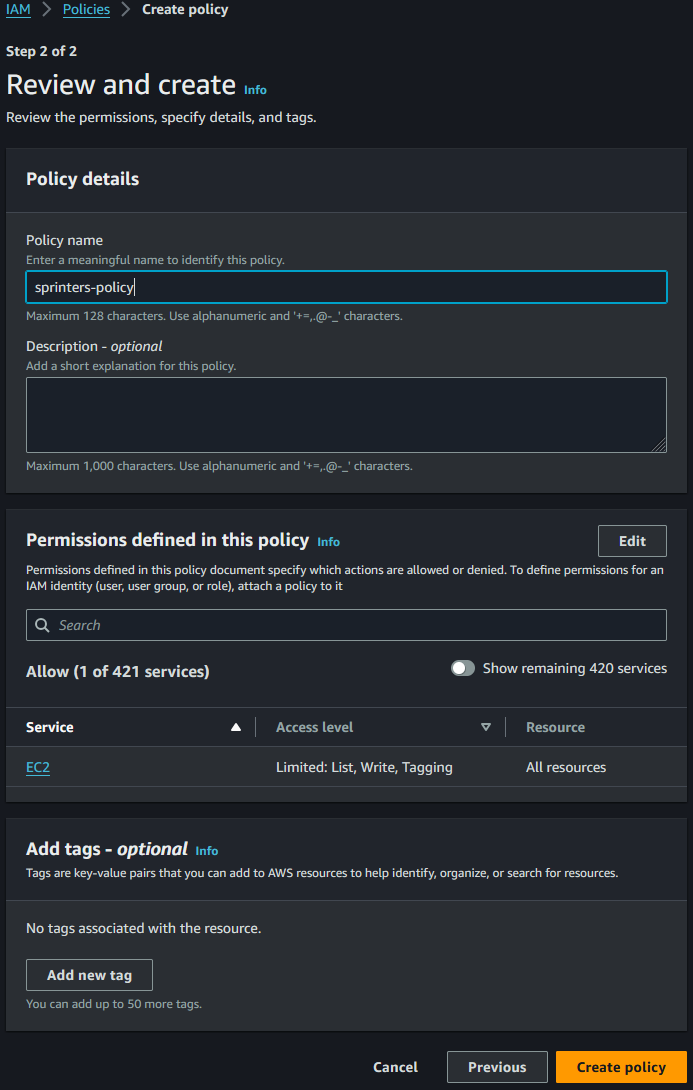
Your IAM policy is now fully set up.
Create the IAM user
Now you’ll need an IAM user which will have that policy attached.
Create the required user in the AWS Console
Give your user the sprinters-user name:
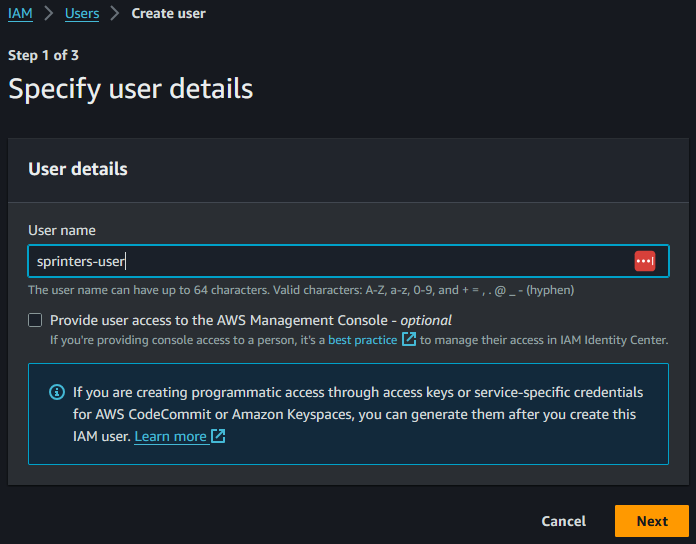
Then attach your newly created sprinters-policy:
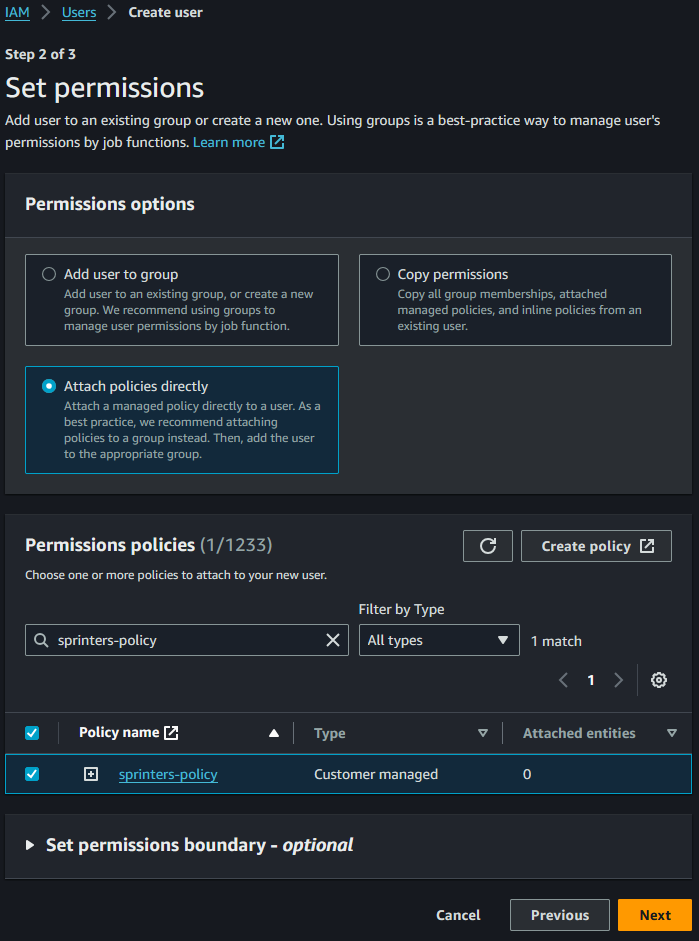
And finalize the user’s creation:
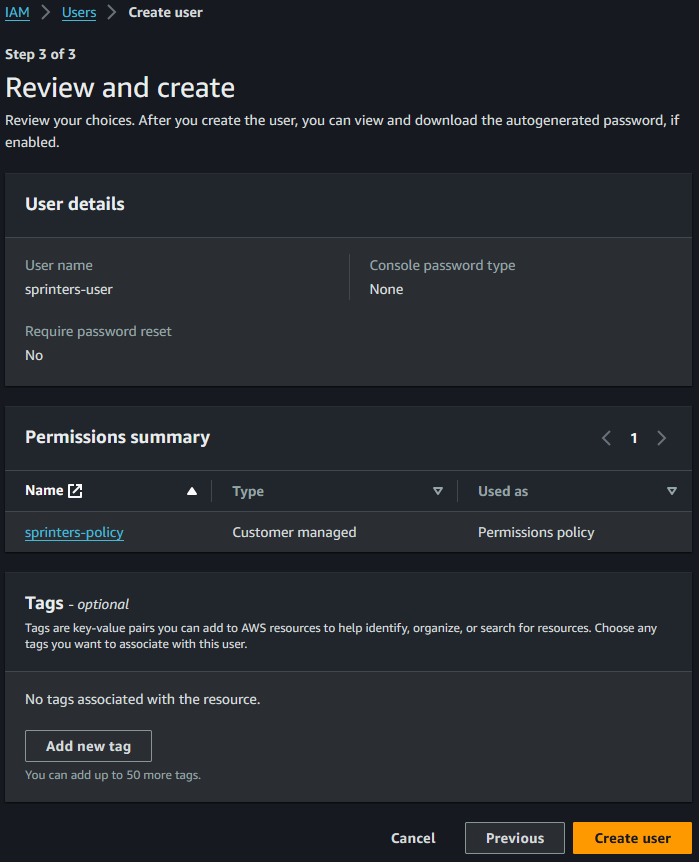
Your IAM user is now fully set up.
Create the credentials
Your IAM user now needs credentials.
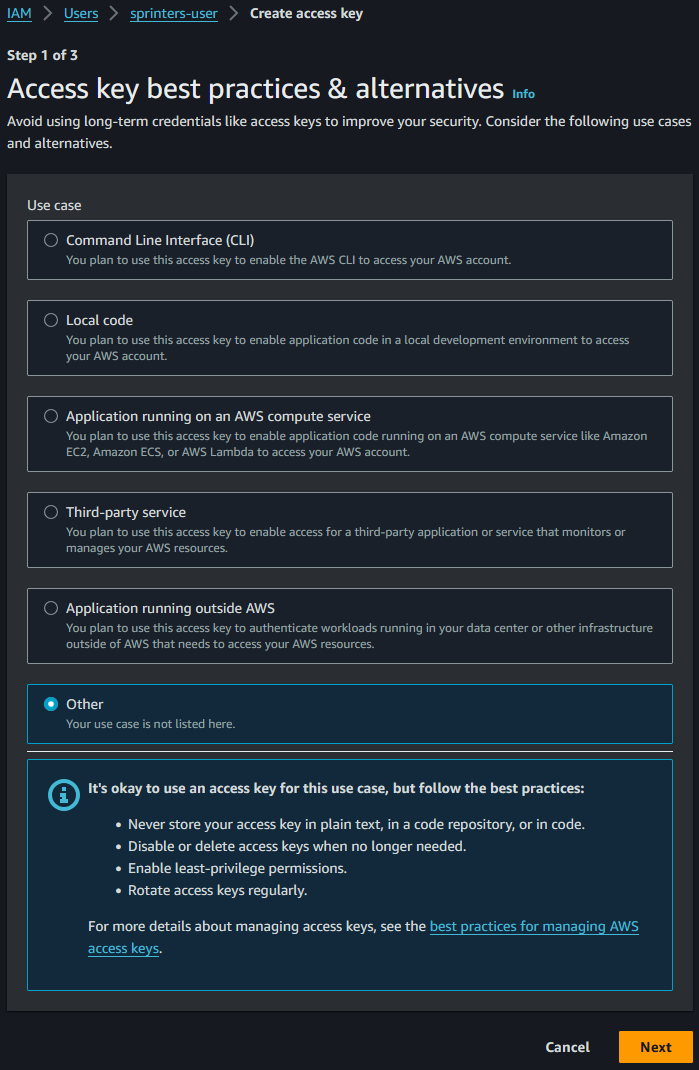
Create the required credentials in the AWS Console
Select Other:
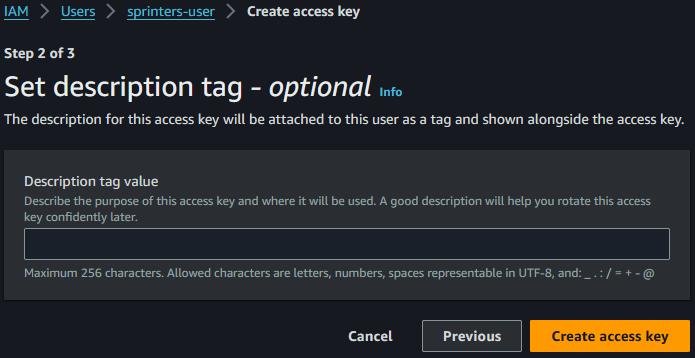
And confirm the creation:
Connect your AWS account
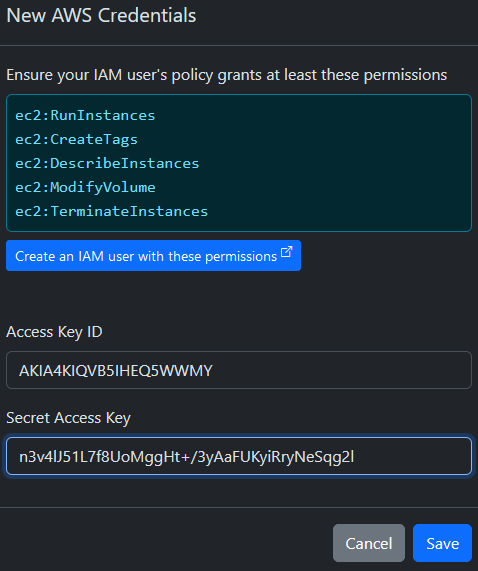
Finally copy both the access key and the secret access key from the AWS Console:
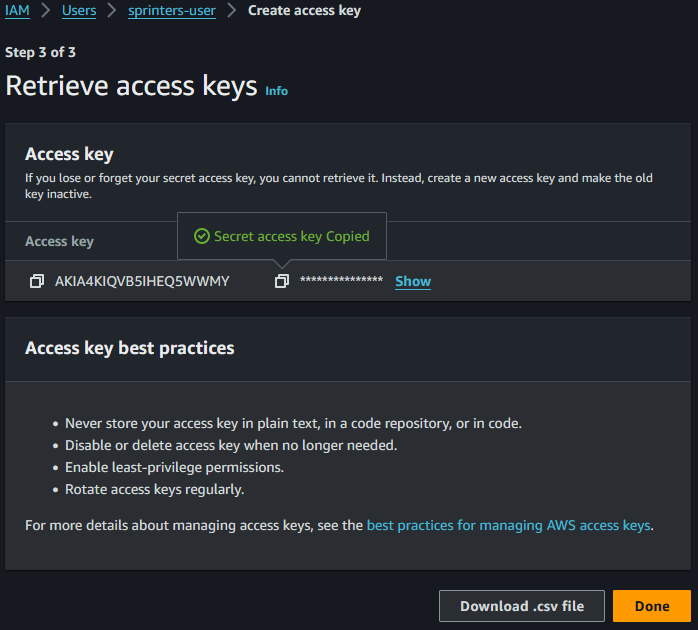
And paste them into Sprinters:
Success
Congratulations! Your AWS account is now successfully connected to Sprinters:
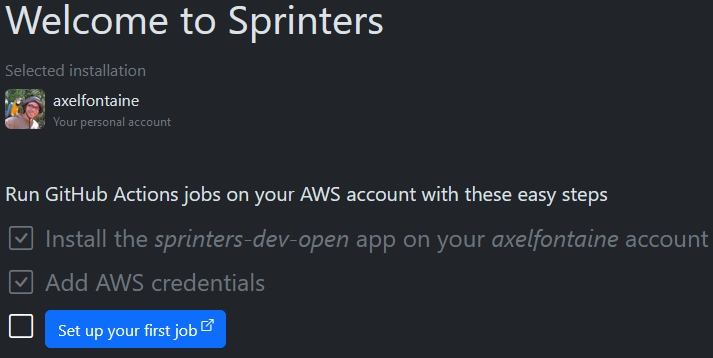
All that’s left to do is run your first workflow job using Sprinters.